When someone tells me that it is really hard to grow social media, I simply shrug my shoulders. Yes, it’s not the simplest thing to do, but with some effort, time, and consistency invested, you can definitely do it. The good news is that you don’t even need to pay for ads. So, if you want to learn how to grow your Facebook group from scratch, keep reading because I’m about to bring to light all my secrets!
But first, let me introduce myself. I own two blogs in different niches: 9 Tailed Kitsune, an anime blog, and Geeky GF, an everything-geeky blog.
Now, Geeky GF is a new blog so I haven’t explored the social media potential yet but 9 Tailed Kitsune has been around for more than 3 years, so I had time to experiment and grow my social media purely organically to a significant size:
- Facebook with over 54 000 followers
- Pinterest with over 48 000 followers
- Instagram with over 10 000 followers
I started growing my Facebook and Instagram late in the game but I quickly learned that you can reach hundreds of thousands of people through Facebook groups. So, I started creating various Facebook groups related to my niche (anime). As of 2023, I have more than 25 Facebook groups that I grew without paying a single penny. The most successful ones are in the range of 10 000 to 80 000 members, and there are more than 10 of those.
Here are my 10 fail-proof tips on how to grow a Facebook group from scratch!
10. Enable Automatic Invites

Let me start by saying that you should have a New Page Experience instead of a Classic Page, as that delivers a revamped page layout and interface that is cleaner and a lot more user-friendly. Also, such a page acts as a separate profile. As a result, you don’t confuse it anymore with your personal profile.
I always create my Facebook groups directly from my Page profile so I don’t have to link anything since I’m automatically the owner and admin of the group. But if your Page is not the admin of the group yet, make sure to switch to a New Page Experience if you haven’t already had it, join the group and make your Page an admin of the group from your personal profile.
To make your Facebook Page an admin of a group, follow these steps:
- Go to the Facebook group where you want to add your Page as an admin.
- Click on the Members tab to view the list of group members.
- Search for the name of your Facebook Page in the search bar at the top of the screen.
- Once you find your Page in the search results, click on the three dots next to its name.
- From the dropdown menu, select Add as Admin.
- Switch to your Facebook Page profile, and go to the Community tab of the group.
- Look for the group invitation, and accept it to confirm that you want to be an admin of the group.
Then all that’s left is to enable automatic invites in your Facebook group:
- Make sure you are logged in as a Page.
- Select the Facebook Group you want to invite members to and click on + Invite.
- Choose Invite Facebook Friends.
- After the Invite followers to this group window pops up, toggle on Automatic Invites.

For Classic Pages, refer to this Facebook guide.
All done! Automatic Invites will automatically invite people who follow and engage with your Page.
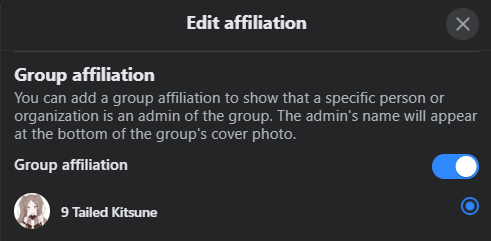
9. Add a group affiliation

After completing the step above, turn on group affiliation. Again, you can find this setting under Group Settings » Customize Group » Group affiliation. Toggle on Group affiliation and select your group, then click Save.
When learning how to grow a Facebook group, it may appear as though the numbers 10 and 9 won’t matter all that much.
Maybe you are thinking that your Page doesn’t have that many fans or maybe you don’t even have a Page set up yet.
However, having your group and Page linked not only adds credibility to your group but also is a win-win situation since members of your Facebook group can see the Page at the top and might be curious and follow it if they appreciate your content.
8. Turn on various badges
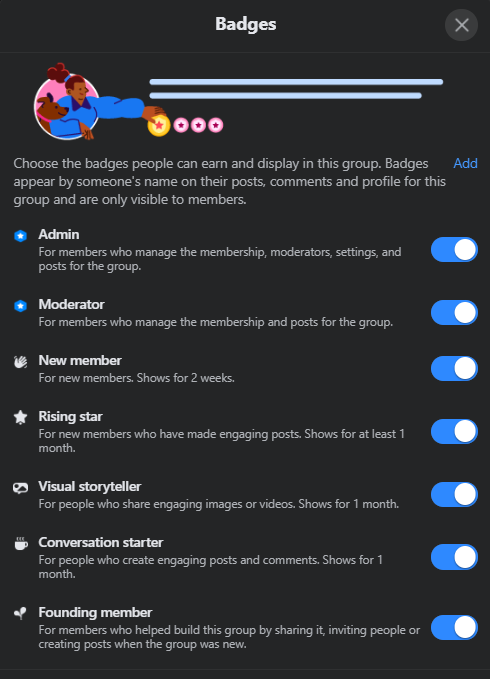
Everyone loves to be rewarded for their efforts. Facebook clearly thought of that when it introduced various badges like:
- Rising star
- Visual storyteller
- Conversation starter
- Founding member
- Valued responder
- Group ambassador
You can add even more badges that allow people to express themselves. Those include the following badges:
- Considering parenthood
- Expecting parent
- Experienced parent
- New parent
- Parent of multiple kids
- Parent of older kid
- Parent of young adult
- Parent of young kid
- Super seller
- Very responsive
Now, it’s up to you and what your Facebook group is when considering badges. I like to keep all the basic ones on for all my groups.
On top of these badges, there is also a little fancy feature called Group expert. As an admin, you can choose Group experts, which is a badge that’s pretty self-explanatory. They are helpful members who know a lot about the group’s topic.
To add a person as a Group expert, simply find the desired member in the Members tab, click on three dots, and then select Add as group expert.
8. Approve posts and member requests in a timely manner
I can’t stress this enough. Most people are impatient creatures and hate to wait.
If you don’t approve posts and member requests frequently, you are not only losing the much-needed engagement in the group but you are also losing already existing members. I mean, who would like to wait 2 weeks before their posts are approved?
7. Make sure that your Facebook group is clean
Always ensure that your Facebook group is in top-notch condition. What that means is that your group is completely free of spam and irrelevant or offensive content. For that, I’ve compiled a few basics Admin Assist rules you can implement. This will save you time and make it way easier to manage your group.
But even with Admin Assist set up properly, check the group frequently for any spam or harmful comments, as it can still happen.
6. Don’t tag @everyone often
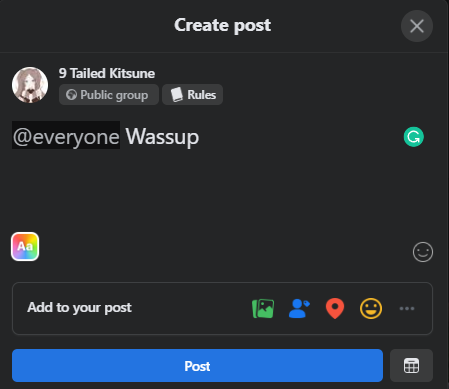
I know that one group that tags @everyone almost daily. And this, ladies, and gentlemen, is not how to grow a Facebook group. It’s annoying and spammy, and if you implement the same strategy, this will harm your group in long run.
Instead, tag @everyone only with the most critical and relevant updates and never more often than weekly. I prefer to do it monthly and even then you might receive some negative reactions.
5. Write a quality group description
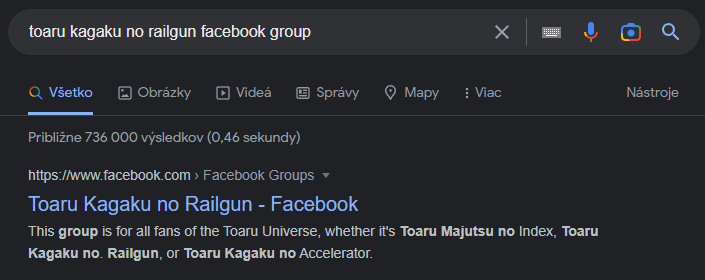
Writing a good Facebook group description is important for three reasons:
- Your group will be easily found on Facebook by users.
- You can be at the top of the Search engine results page like Google.
- Members are more likely to join if they know what to expect from the group.
For example, when I create a description for a Facebook group that is about a specific anime, I like to naturally include as many keywords as possible.
Then it’s also nice to introduce what the anime is about, which can be easily copied from Wikipedia or another credible source.
By how neat the group description is, it helps potential members decide whether it’s even worth joining the group.
4. Choose a relevant group name
When creating your Facebook group, you must have an idea of what the group is about.
For example, I have a blog called 9 Tailed Kitsune, so I named one of my groups 9 Tailed Kitsune Anime Community. It’s straightforward and there is the keyword “anime” in the title, which sums up what’s the group about.
To conclude, don’t overthink the name, and make it as apt and to the point as you can. The simpler, the better applies here.
3. Welcome new members weekly
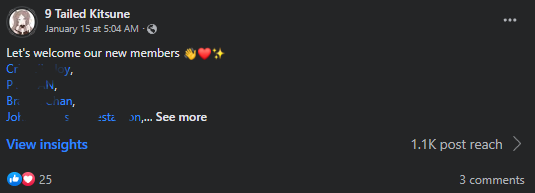
Welcoming new members every week is a great way to make them feel welcome, notice the group, and produce a warm atmosphere.
Also, you might have noticed that you can manually welcome new members on a weekly basis.
Did you know, though, that you can now enable this feature in Admin Assist to run automatically and stop worrying about it completely?
To turn on the automatic welcome post:
- Select the Facebook group where you want to publish it.
- Head over to the Admin Assist section on the left side of your screen.
- Scroll down and find Publish a welcome post at the bottom.
- Click on the Add button.
- Customize the welcome message.
- Hit Add to Admin Assist.
- If needed, you can also choose to tag other admins in the introduction.
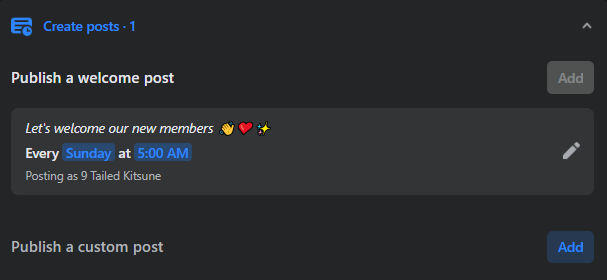
A few words about Admin Assist’s Publish a welcome post feature:
- It’s best to let it choose the time automatically as it will select the best time with the most engagement.
- You can customize the message to anything you want but ensure that it makes sense. My niche is entertainment so I can afford playful emojis but it might be completely different in your case.
- I don’t like to tag admins because I have public groups and then people tend to send me PMs but this again depends on the nature of your group.
2. Interact with your members

This is a step tightly tied to the #1 tip.
Reacting to others’ posts and comments, whether it’s by liking them or responding makes your Facebook group members feel like someone cares about what they have to share or say.
However, don’t force it and generate “random” responses. Put some thought into each response so it’s as genuine as it can be.

The most essential rule when one wants to learn the magic of how to grow a Facebook group organically is to engage with the group. This is immensely important when you are starting as there are not many members yet, so sharing fresh and relevant posts can produce reactions, comments, and even reshares. This is also why I like to keep my Facebook groups public but that’s, again, up to you.
You can also add hashtags to your posts, this can be helpful if you have a public group as this can show when even people outside the group browse some keywords. Also, keep an eye on what hashtags your members are using when creating posts to know what’s popular. That said, don’t go overboard with hashtags.
As a rule of thumb, it’s generally recommended to add no more than two to three hashtags to your Facebook posts. You don’t want to look like a spammer, after all, Facebook is not Instagram so don’t go crazy on hashtags. According to Facebook’s guidelines, you should use only one or a few hashtags to keep it simple. In this context, it’s probably safe to say that a few hashtags means two three, or four, although it’s not a universal interpretation.
Needless to say, even a small group can have a big engagement rate.
On top of everything I said, I think this is one of the criteria Facebook uses when recommending groups or placing them at the top of the search when there are groups with identical names. This is only an assumption but I’m talking from experience because one group I had started growing rapidly after I had two group experts creating many quality posts daily for months.
Final Thoughts
In conclusion, learning how to grow a Facebook group from scratch takes time, patience, and effort. But with the right strategies and tactics, you can attract, engage, and retain a loyal community of members.
Remember to be consistent with your content and engagement, use relevant keywords and hashtags, and leverage all available fancy features according to the group’s needs. Above all, always prioritize the needs and interests of your members, and you’ll see your group flourish in no time.